ClickUp Time Tracking Methods & Integrations You Should Try Out
ClickUp time tracking. A tool that can help you meticulously log every minute of your workday.
But is it really like that?
Don’t get me wrong—ClickUp is an all-in-one productivity powerhouse.
Its time tracking, though? It exists. It’s there. But it’s much like pineapple on pizza or replying to a company-wide email; not for everyone.
So, what do you do when the built-in time tracking feels more like an inconvenience than a truly helpful tool? You explore your options. You don’t have to settle for “just okay” when it comes to tracking time and productivity.
In this guide, we’ll walk you through different ways to track time in ClickUp, explaining how its native tracking works and what smart integrations are. So, if you want to bill clients accurately, analyze productivity, or prove you actually worked today (khm, remote workers), I guarantee you’ll find a method here that will make time tracking in ClickUp a breeze.
Let’s roll.
What are the methods for tracking time in ClickUp?
As you probably know, ClickUp has a built-in time tracking feature to help you log hours, stay on top of tasks, and keep your projects running on time.
Here’s how native time tracking works in ClickUp, step by step:
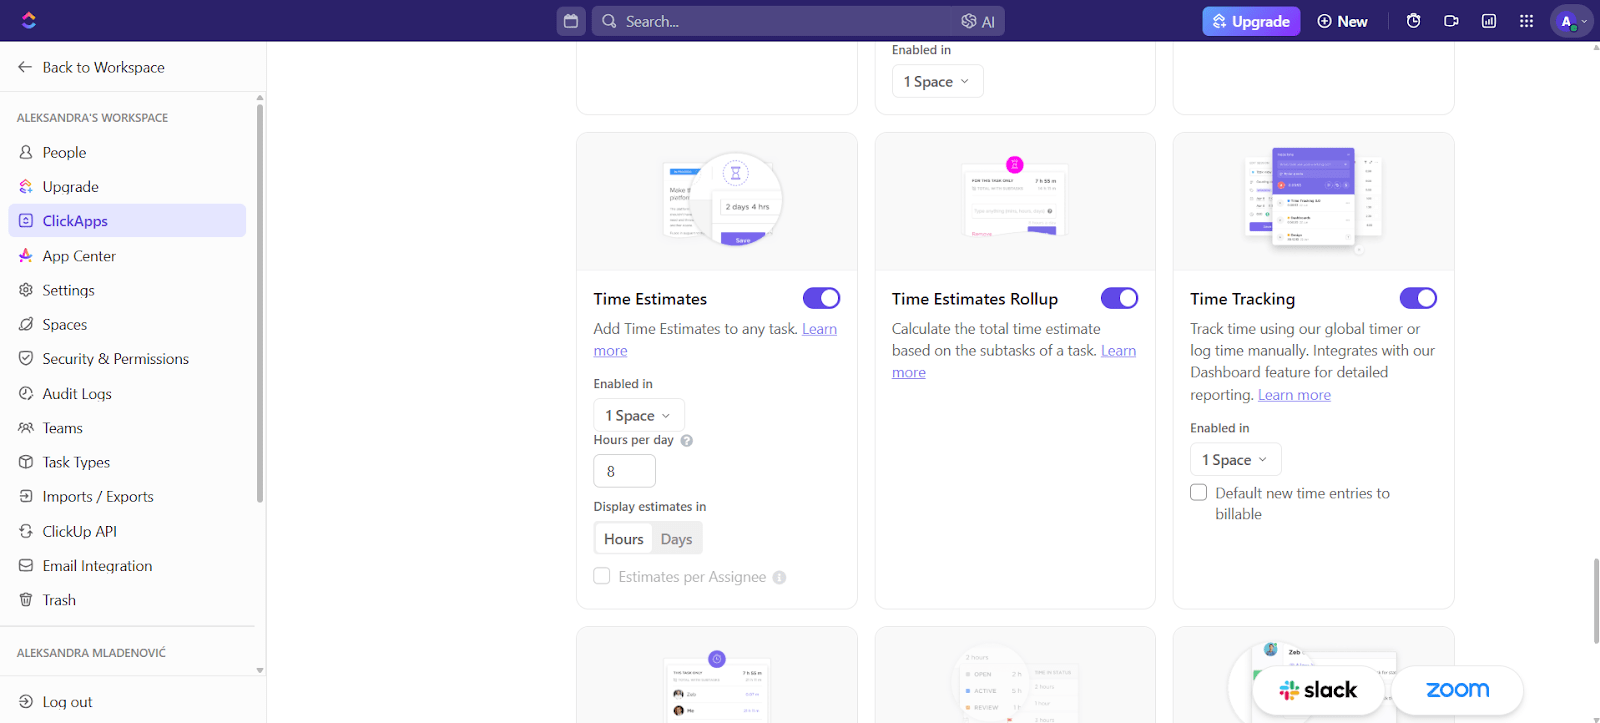
1. You go to the Workspace settings, and under ClickApps, find and ensure Time Tracking, Time Estimates, Time Estimates Rollup, and Time Tracking Rollup are enabled to cover all time-related features.
2. ClickUp provides a manual timer. There are two ways to track time: by adding a manual time entry or using a timer. With manual time entry, you open a task, add time spent (entering start and end time or total duration), and save the entry. If you want real-time tracking, you simply start the timer when you begin work and stop it when you’re done, and ClickUp will log the time automatically.
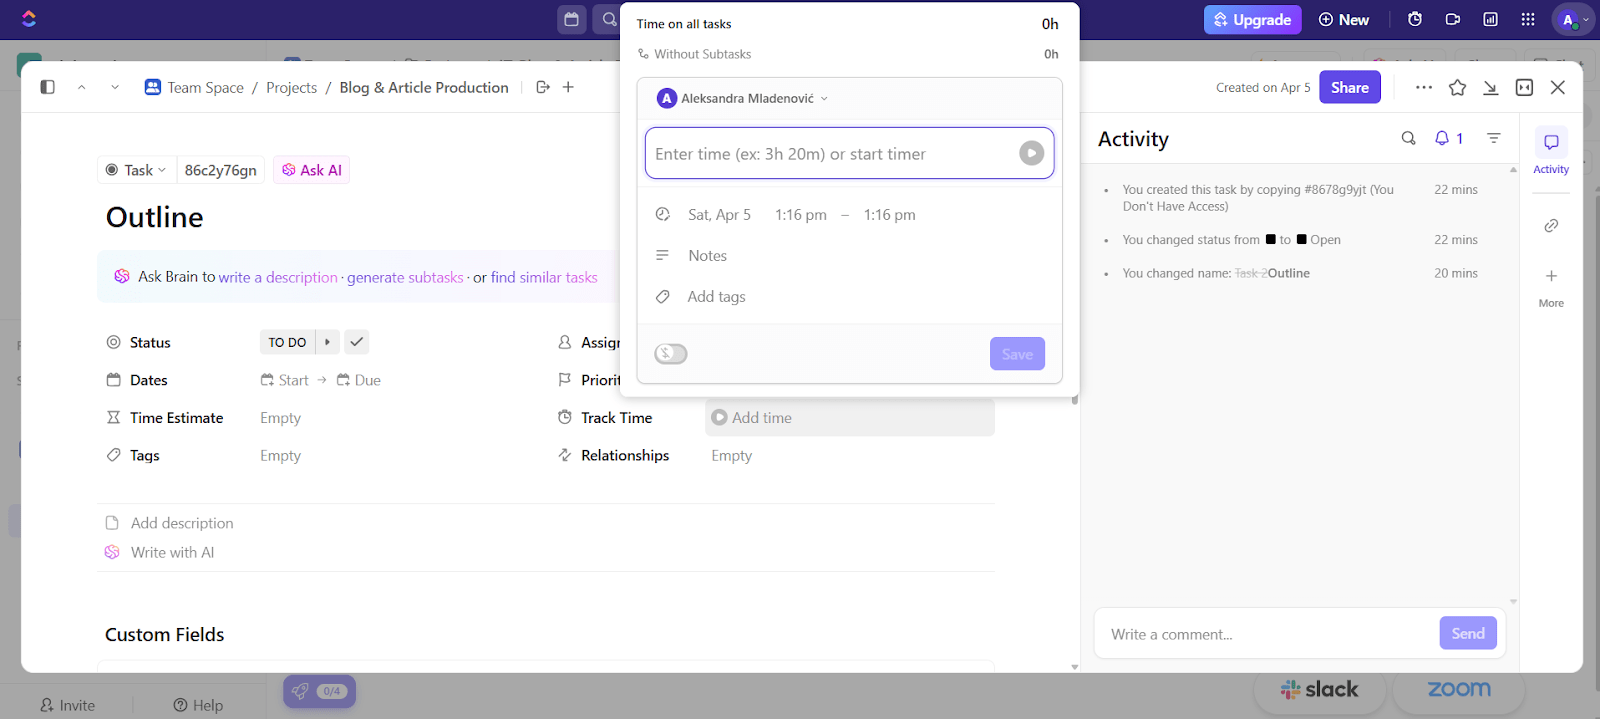
3. Inside any task, you can see a log of tracked time—who tracked it, how long, and if there are any notes. You (or admins) can edit/delete time entries as needed.
4. You can navigate to Timesheets in your sidebar and see how long it took to complete particular tasks or what tasks you are currently tracking. Here’s what my Timesheets looked like:
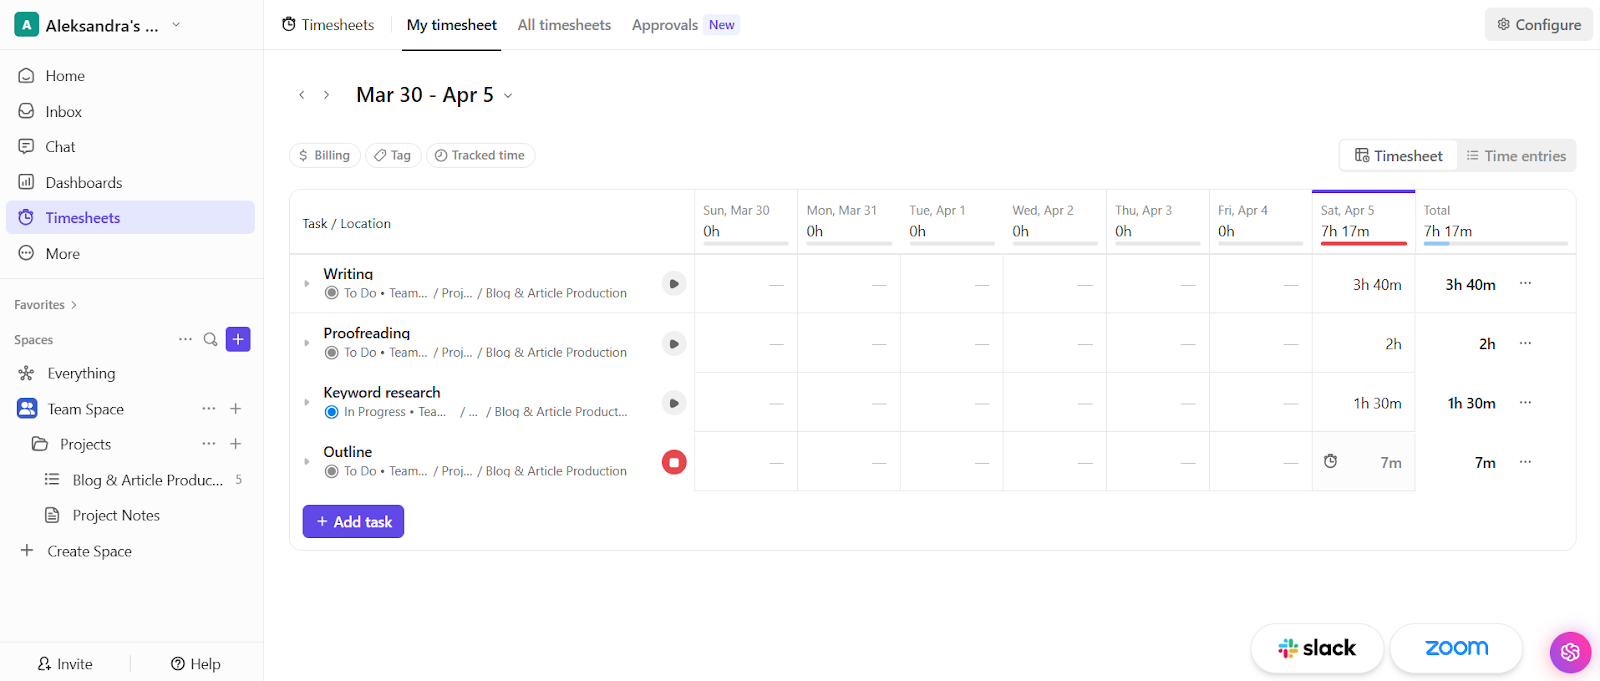
And that’s it; in just 4 quick steps, ClickUp allows you to track time. It’s truly not rocket science.
If you’re working with a team, you can assign tasks to different members, track who’s logging time (and how much), and even mark hours as billable when needed.
Once the time’s tracked, you can check out time reports to see the bigger picture, like total hours per person, project, or task. And please remember, ClickUp offers time tracking reports, but the level of reporting depends on your plan (some features are only available on Business or higher plans).
Also, keep in mind that ClickUp doesn’t offer full profitability or invoice-based reports like Zoho Books, for example. If you need profitability, margin tracking, or client billing, you should consider plugging a dedicated tool into ClickUp to handle reports and invoicing.
Pros & cons of ClickUp time tracking
Now that you know how time tracking in ClickUp works by default, let’s check out its pros and cons so that you can understand what works well and where the app falls short for your needs.
Pros of ClickUp’s native time tracking
Cons of time tracking in ClickUp
- The app doesn’t allow you to generate and send invoices. ClickUp’s native time tracking allows you to log and track time, but it doesn't have built-in invoicing features. If you work as a freelancer or run an agency that bills clients based on time worked, this can be an inconvenience.
- There are no advanced financial reports. ClickUp can help you track time, but it doesn’t provide financial reports like profitability, margin tracking, or revenue per hour; you'll need to integrate a third-party tool to manage your financial reporting.
- The app doesn’t offer automatic time tracking. You can forget to start or stop the timer without automatic tracking, leading to missed or inaccurate time entries. And if you work in a team and need precise and accurate tracking, this can cause inconsistencies, especially when juggling multiple tasks and team members. (Not to mention, there’s an extra manual effort to fill in or correct time logs, which is time-consuming and prone to errors.)
Is ClickUp’s native time tracking right for you?
I mean, it could be. 🤷
ClickUp’s native time tracking is great for basic needs, especially if you already use ClickUp for project management. It’s simple and easy to use. But if you need advanced features and automation, you should consider third-party integrations like Memtime, Clockify, or Harvest.
6 alternatives to ClickUp’s native time tracking
Thankfully, there are many alternatives that supercharge Clickup’s time tracking.
Here are the top 6 add-ons to choose from:
#1 Memtime
❓Why you should use the app: Memtime is THE upgrade for ClickUp users—it’s an automatic time tracker that integrates smoothly with ClickUp, ensuring accurate time tracking without all the manual hassle.
💸 Pricing: Starting from $16 per user per month for the Connect plan, billed biannually, giving you access to 100+ integrations, including ClickUp.
Memtime is the app you should go to to step up your time tracking game.
And I’m not just saying that because I use the app. Daily. And love it with all my heart. ♥️
But because it’s so painless to use.
Our app’s mascot is a sloth. 🦥 We chose it on purpose because it matches our philosophy of making time tracking easy and stress-free. Sloths are known for their relaxed nature and unhurried (unbothered?) movements. And our goal was to simplify time tracking without adding complexity or stress.
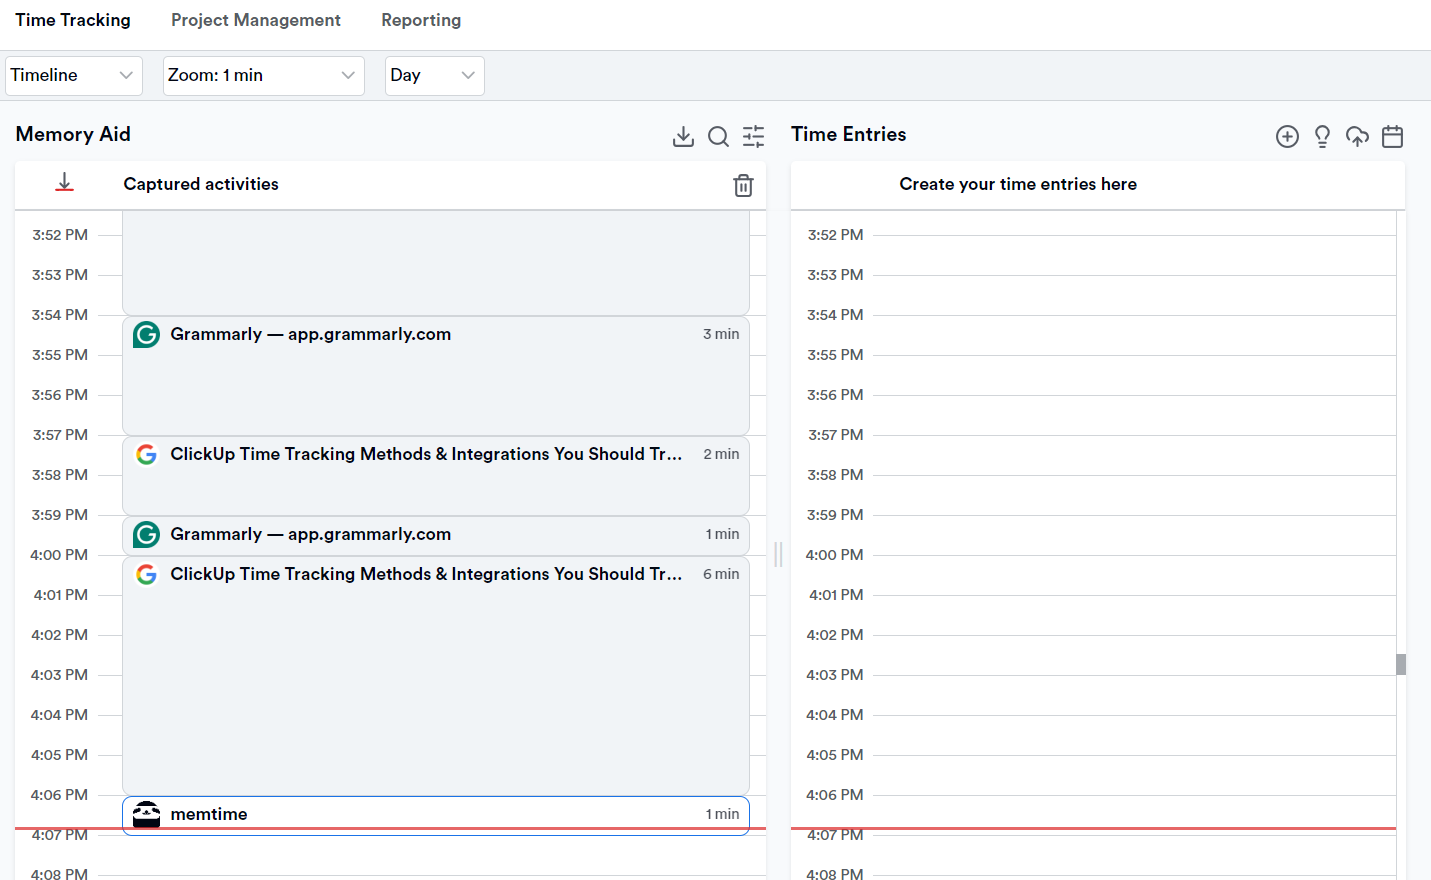
Here’s how the app works: it detects when you’re using your computer and logs your time in all programs, so you don’t have to use a Start/Stop timer or remember where your time went. It runs silently in the background, capturing every second of your work in an automatic timeline.
Meaning that all those tabs, documents, meeting hours, Slack, and Teams chats will be captured in one place.
And the best part? When I say Memtime is “silent”, I mean it: you won’t even remember it’s there. All you need to do is turn on your computer and start working on tasks; you don’t even have to open the app.
Here are some other Memtime features worth noting:
Now comes the fun part.
Memtime integrates with ClickUp via a two-way sync, meaning you can import your ClickUp projects and tasks into Memtime and then export time entries back to ClickUp.
Here’s how you connect the two apps:
- First, you download Memtime. You can start with our 2-week free trial; just sign up with your email, no credit card info required.
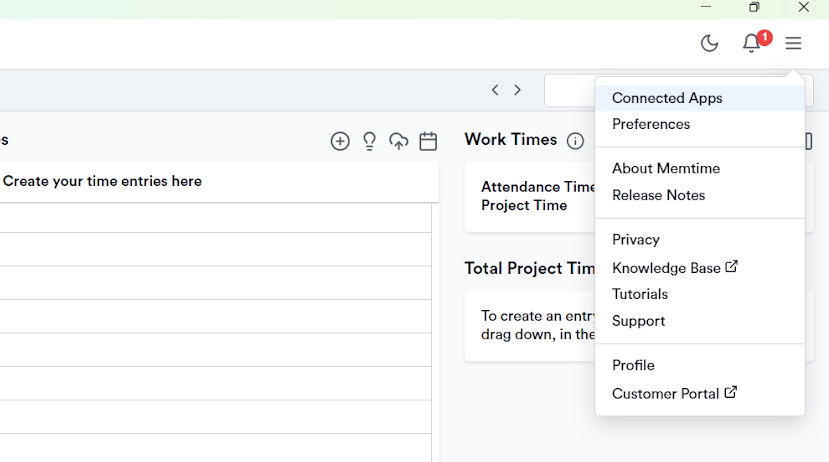
- You can choose a connected app during Memtime installation. Or you can open Memtime, click the burger menu at the top right corner, and choose Connected Apps (that’s how I did it).
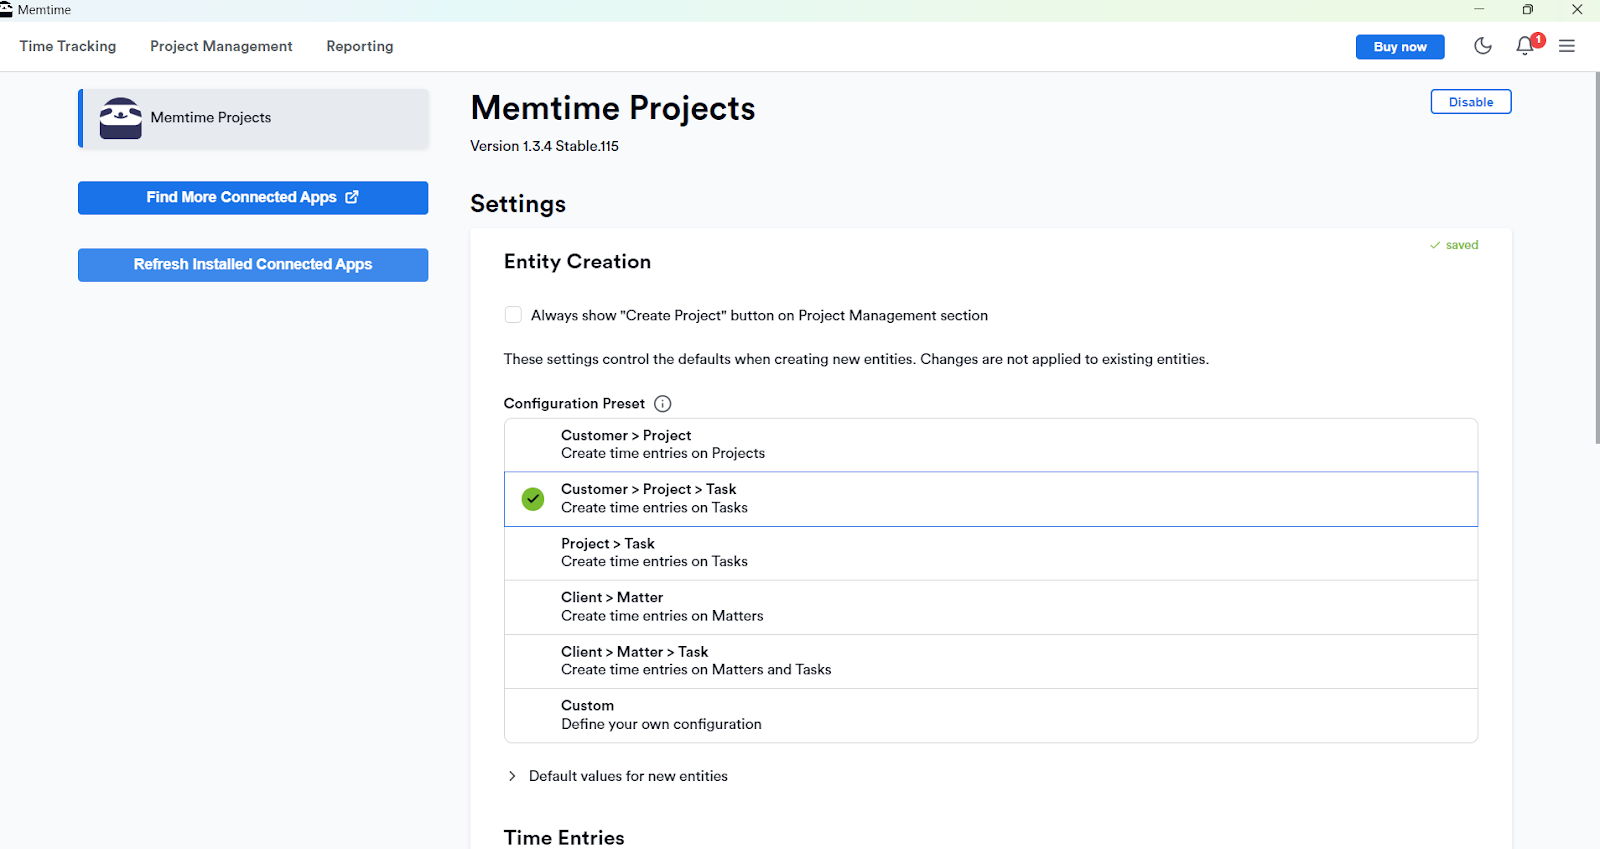
- You click the button Find More Connected Apps.
- You search for ClickUp.
- You click the Install button to connect the two.
- Once the installation is done, you click the Refresh Installed Connected Apps to ensure ClickUp is authenticated.
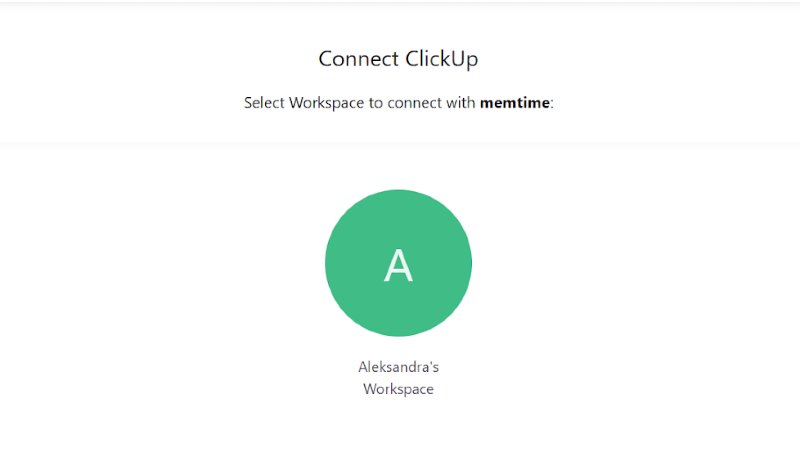
- Then, you select the Workspace you wish to connect to Memtime. Like so:
- From that point on, all your captured activities in Memory Aid can be turned into time entries in ClickUp. To do so, you need to click the “+” icon right above the Time entries section/column to select your captured activities that should be turned into time entries.

So, how does this all sound? The moment you create a time entry and assign it to a ClickUp task, it appears in ClickUp, where you want it.
It doesn’t get simpler than that. 😏
Don’t make me beg. Just click the button below and start your free trial. You won’t regret it.
Oh—and just so we’re clear—Memtime is the only tool on this list that provides automatic time tracking, meaning you don’t have to use a Start/Stop timer.
#2 Clockify
❓Why you should use the app: Clockify is a simple manual time tracking tool that integrates with ClickUp so you can monitor time spent on tasks within the ClickUp interface.
💸 Pricing: Clockify offers a free plan, and paid plans start at $3.99 per user per month, billed annually, giving additional functionalities like reporting and administrative controls.
Clockify works on the web, desktop, mobile, and as a Chrome extension. Once connected with ClickUp, it can automatically detect your ClickUp tasks: when you start a timer, Clockify pulls in the task name so your time logs stay organized and accurate. It could work well for teams or freelancers who want manual time tracking that fits into their ClickUp workflow.
Here’s how the integration works:
- You install the Clockify Chrome extension to add a Start/Stop timer button directly in your ClickUp task view.
- When you open a task in ClickUp, Clockify automatically recognizes the task name, so you can just hit the timer, and it starts logging time immediately.
- You can stop the timer from anywhere: ClickUp, the Chrome extension, your mobile device, or the desktop Clockify app.
- You can go to Clockify’s web version to review or edit tracked time, view reports, invite teammates, and even export timesheets or invoices.
By integrating Clockify with ClickUp, you can track time spent on tasks without leaving the ClickUp environment.
#3 Everhour
❓Why you should use the app: Everhour is a time tracking and budgeting app that integrates with ClickUp and allows you to track time, set estimates, and see what your team’s working on.
💸 Pricing: Everhour offers a Team plan starting at $8.50 per user/month, billed annually (minimum 5 users), which includes all integrations, reporting, invoicing, and budgeting tools.
Everhour could be a great alternative for teams who want deeper insights into time spent across tasks and projects. It provides a Start/Stop timer, manual time entry, time estimates, and flexible reporting. It’s available on the web and via a Chrome extension, which brings time tracking directly into the ClickUp workspaces.
Here’s how the integration works:
- You install the Everhour Chrome extension and embed a timer into ClickUp. Once it’s installed and connected, you’ll see Everhour controls directly inside your tasks.
- From there, you can start or stop the timer, manually log time, and even add time estimates without leaving ClickUp.
- Everhour also gives you a live view of what your teammates are working on in real-time.
- For advanced reporting, budget tracking, or invoicing, you can visit the Everhour dashboard and pull detailed reports to share summaries with clients.
By integrating Everhour with ClickUp, you get ClickUp’s task and project management and Everhour’s manual time tracking and reporting flexibility.
#4 Harvest
❓Why you should use the app: Harvest is a time tracking and invoicing tool that integrates with ClickUp, so you can sync logged hours. The app comes with a manual Start/Stop timer. We’ve actually reviewed its features in-depth here.
💸 Pricing: Harvest offers a free plan for single users and comes with limited features. The Pro plan is priced at $11 per seat per month, billed annually, providing access to integrations.
Harvest is a time tracking app available on desktop, mobile, and web platforms. It provides a Start/Stop timer, manual time entry, reporting, and invoicing. Once integrated, Harvest syncs time entries with ClickUp tasks, ensuring tracking and billing.
Here’s how the integration works between the tools:
- You first find Harvest in the Integrations section in ClickUp and then authorize ClickUp to access your Harvest account.
- If you want to track time with Harvest within ClickUp, you use the Harvest timer embedded in the task to start and stop time tracking. Time entries will automatically sync with your Harvest timesheet, including task titles and IDs.
- You can then access your Harvest account to view reports on time tracked and use this data to invoice clients, analyze project progress, and manage team workloads.
By integrating Harvest with ClickUp, you can track time spent on tasks without leaving ClickUp, and everything seems to be connected together to streamline your invoicing processes.
#5 Hubstaff
❓Why you should use the app: Hubstaff is a productivity and workforce management tool that integrates with ClickUp, allowing you to track time on tasks, monitor progress, and manage budgets.
💸 Pricing: Hubstaff offers a Grow plan at $7.50 per seat per month, billed annually, which includes time tracking and one integration. For unlimited integrations, you should sign up for the Team plan, available at $10 per seat per month, billed annually.
Hubstaff is a desktop, mobile, and web app that provides a Start/Stop timer, manual time entry, detailed reporting, invoicing, and budget management. Once integrated, ClickUp tasks assigned to team members appear in their Hubstaff apps, allowing time tracking and productivity analysis.
Here’s how the integration works:
- You need to connect your ClickUp Workspace to Hubstaff, which is similar to how Memtime integrates.
- Then, in Hubstaff, you select the ClickUp Workspace and choose whether to sync all projects or select specific with Hubstaff.
- Once you assign ClickUp tasks to your team members, these tasks will appear in their Hubstaff apps across desktop, mobile, and web platforms.
- Team members can start or stop the timer directly from their Hubstaff app while working on ClickUp tasks.
- You can then use Hubstaff reporting features to view detailed timesheets and monitor task progress.
- Time tracked for each task will show up as a comment within ClickUp, giving you easy access to time logs.
By integrating Hubstaff with ClickUp, you can track time spent on tasks, gain insights into team productivity within one platform—Hubstaff.
#6 TimeCamp
❓Why you should use the app: TimeCamp is a time tracking and productivity tool that integrates with ClickUp, allowing you to monitor time spent on tasks, generate invoices, and analyze reports.
💸 Pricing: For advanced functionalities and one integration, the Premium plan starts at $4.99 per user per month, billed annually. If you want unlimited integrations, you should sign up for the plans above.
TimeCamp is a desktop, mobile, and web app that comes with a Start/Stop timer and allows manual time entry, detailed reporting, and invoicing. Once integrated, ClickUp tasks can be tracked in TimeCamp, allowing you to manage time and streamline billing processes.
Here’s how the integration works:
- In TimeCamp, you go to Settings, choose Integrations, find ClickUp, enable the connection and authorize access.
- TimeCamp will import your ClickUp tasks and projects so you can start tracking time.
- You can also open any task in ClickUp and start the timer (via the TimeCamp extension). Your time entries sync automatically with TimeCamp for reports, invoicing, and more.
By integrating TimeCamp with ClickUp, you can track time spent on tasks, gain insights into team productivity, and manage project budgets.
Wrapping up
If ClickUp’s time tracking is your perfect match, stick with it, by all means.
But if you're juggling multiple clients, managing a team, or simply don’t trust yourself to remember to press the “Start” button every time you want to start tracking (samesies!), you should consider other options.
Luckily for you, we live in an app-filled world, there’s an app for everyone. Choose the tool that works for you, sync it with ClickUp, and see just how precious your time is.
Now, go forth and track like a pro. Or a sloth. No rush here. 😉 🦥
Aleksandra Mladenovic
Aleksandra Mladenovic is a copywriter and content writer with six years of experience in B2B SaaS and e-commerce marketing. She's a startup enthusiast specializing in topics ranging from technology and gaming to business and finance. Outside of work, Aleksandra can be found walking barefoot in nature, baking muffins, or jotting down poems.